
This is a hot topic after we started to work in a Data Centre migration project for a client where we chose to do a Lift-and-Shift approach to migrate their on premise physical / virtual servers to Azure. Their key ask was to have their existing Windows 2003 servers running in Azure as they had key applications which were not ready for a later version of the OS and most of these were legacy application where either the creator is not with the firm.
We did search high and low to find a properly documented step by step guide, however, never found the right ones. We had to finally come up with our own article and here is it being shared to all those who still are looking for this document.
Overview
The following guide assumes that the user has basic knowledge of using Windows and PowerShell.
Although some familiarity with the Azure Portal would be beneficial, it is not necessary, as a step by step approach will be provided.
Process Workflow:
- Create a new Virtual Machine in Hyper-V
- Install Windows Server 2003 R2 SP2 from ISO in the Hyper-V Virtual Machine
- Remove any unwanted devices from device manager that are remnants from the physical device.
- Install Hyper-V Integration Services (for Windows 2003 Server and older OS version)
- Sysprep VHD and dis-associate (Remove) from Hyper-V Virtual Machine
- Upload this VHD to Azure Storage Blob and create a VM using this VHD
Pre-requisites
The following prerequisites must be met, before performing the Core capacity check steps.
- A Physical server with Windows 10 or Windows 2012 R2 and above OS installed with Hyper-V Role/feature enabled.
- Hyper-V Integration Services installer (vmguest.iso or vmguest.iso)
- Windows Server 2003 R2 ISO (ask the client to provide a volume license version of ISO or try to google around for Windows Server 2003 R2 -> upgrade to SP2 )
- .Net 2.0 or above (NetFX20SP2.exe)
- Windows Management Framework Core package (Windows PowerShell 2.0 and WinRM 2.0)
- Internet Explorer 8 ( x86 / x64)
- Internet connection
- Valid Azure Subscription
- The person who will perform the below steps must have one of the following roles in the Azure subscription
- Owner
- Contributor
- Some familiarity with the Azure Portal would be beneficial, although not necessary
- Latest version of Microsoft .NET Framework (download link)
- Latest version of Microsoft Windows Management Framework (download link)
- Latest version of Microsoft PowerShell (download link including detailed installation guide)
- Latest version of Azure cmdlets (installation guide), although steps are provided below
- Some familiarity with PowerShell ISE, although not necessary (documentation)
- Some familiarity with the Azure Portal would be beneficial, although not necessary
- Some familiarity with PowerShell scripting would be beneficial, although not necessary
Pre-capture Checks and Procedures
Just before we begin, let’s prepare by downloading all the required pre-requisites. Hyper-V integration Services requires the below:
- Windows Server 2003 R2 (minimum)
- .Net 2.0 or above
Once we have the required files, we proceed further to the next steps of creating a blank Virtual Machine and start with the VHD preparation.
Create the Virtual Machine
The following steps will demonstrate using Hyper-V Manager to create the virtual machine.
Please do copy the captured VHDs/VHDXs from the shared location to the local drive on the Hyper-V enabled build machine before proceeding to follow the steps below.
Create the Virtual Machine and Virtual Hard Disks
We now have a Fixed size VHD file which is ready to be standardized. We will now create a Virtual Machine, follow the steps below.
| Step | Snapshot (if any) |
|---|---|
| Open Hyper-V Manager and ensure that the host you want to work with is selected | 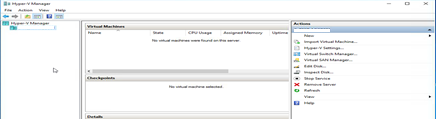 |
| Once you have placed the files where you want them, go to the Actions pane at the right. Click New, then Virtual Machine to start the wizard. |  |
| The first page of the New Virtual Machine Wizard is purely informational. Click Next when ready. |  |
| he first data screen asks for the name of the virtual machine and the initial location. The name that you choose will be used as a label in all virtual machine tools, including Hyper-V Manager |  |
| On the next screen (windows 10, 2012 and later), you’ll be asked to choose the Generation of the virtual machine. Choose Generation 1
Click Next |
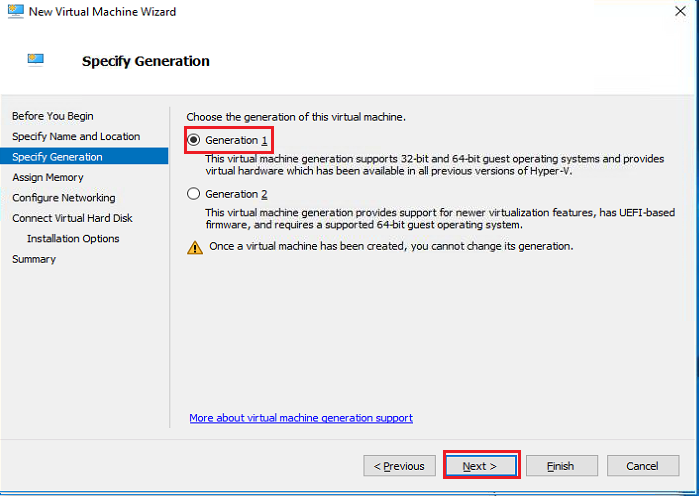 |
| On the next screen, you set the preliminary memory settings for the virtual machine. You only have two options: the amount of Startup memory and whether you wish to Use Dynamic Memory for this virtual machine.
Just click Next with default values |
 |
| Next, you’ll need to determine how to connect the virtual network adapter.
You can leave it at Not Connected, which means the virtual machine will begin its life without any network connectivity. OR you can connect it to a virtual switch right away Click Next when ready |
 |
| After networking, you’ll be asked to configure the first virtual hard disk for the virtual machine. Choose Attach a virtual hard disk later.
Click Next |
 |
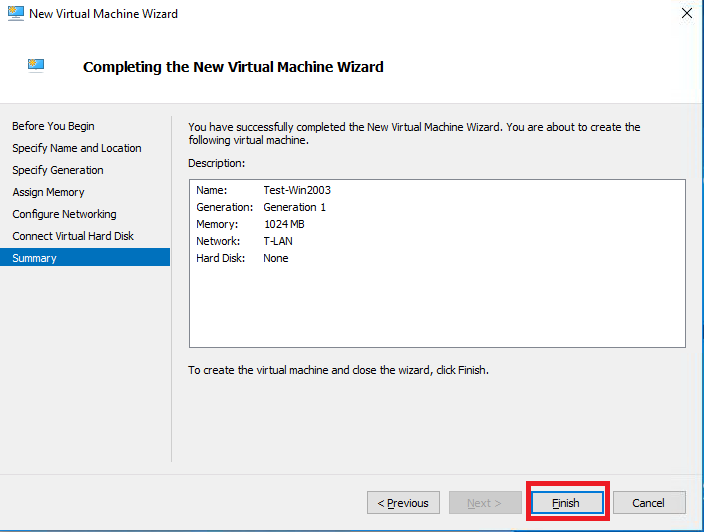
| Once you click Finish, the wizard undertakes all the options that you selected and creates the virtual machine.
The wizard does not turn the virtual machine on, so you have an opportunity to make any desired modifications beforehand, such as to vCPU count or memory allocation. |
 |
Create the Virtual Hard Disk (VHD Format)
Once the Virtual Machine is created, we need to create a new Fixed size VHD file (the format supported in Azure) and attach to the existing Virtual Machine we created in the above steps).
| Step | Snapshot (if any) |
|---|---|
| Open Hyper-V Manager and ensure that the host you want to work with is selected |  |
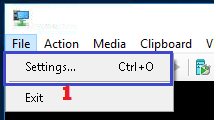
| Right click on the Virtual Machine and select Settings… |  |
Settings dialog
|
 |
| Now Click New in the Virtual Hard Disk on Right hand pane to bring up New Virtual Hard Disk Wizard | 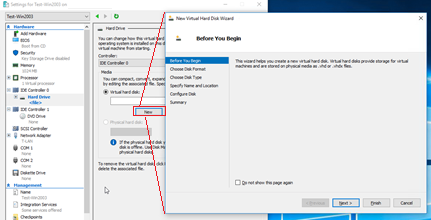 |
Choose Disk Format
|
 |
Choose Disk Type
|
 |
Specify Name and Location
|
 |
Configure Disk
|
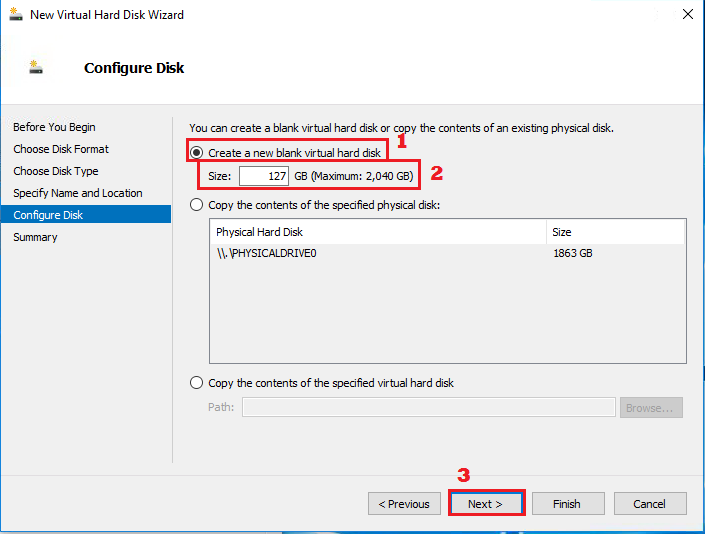 |
| Completing the New Virtual Hard Disk Wizard
Click Finish to create the Hard Disk |
 |
Settings dialog
|
 |
Build the Virtual Machine with Windows Server 2003
The below steps will now show the Build process (minimal steps to be followed)
| Step | Snapshot (if any) |
|---|---|
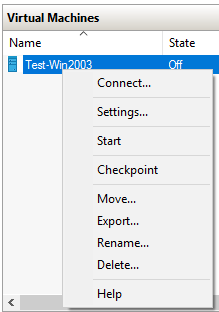
| Right click on the Virtual Machine (from Virtual Machines pane)
Choose Connect |
 |
Click  to start the Virtual Machine once you see the Virtual Machine Connection window popup. to start the Virtual Machine once you see the Virtual Machine Connection window popup. |
 |
| Click Enter key to start the build process |  |
| Click F8 – I Agree |  |
| Press Enter to Install |  |
| Choose
Format the partition using the NTFS file system <Quick> option |
 |
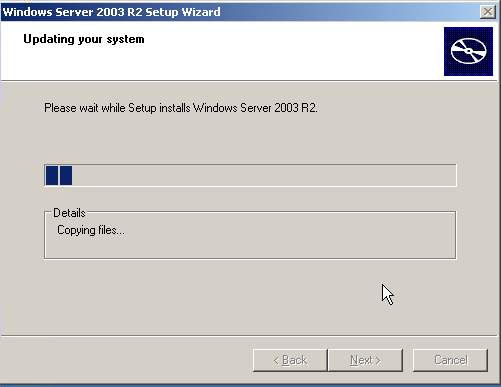
| Allow the process to complete the build process |  |
| After a reboot, the Windows initial setup wizard will continue |  |
| Just note that if you try to click the mouse in the Connection window and get a popup as shown, that would mean the VHD is running Windows 2003 Server OS. In these case, we will require to browse and perform the initial configuration tasks using keyboard till Hyper-V Integration services are installed. | 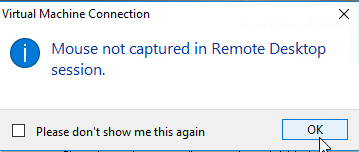 |
| Press Windows Start button, while you are connected to the Build Machine (in Full Screen please)
Use Navigation keys to go to Control Panel (for Windows 2003 Servers) |

|
When the license window appears
|
 |
| Click Next |  |
|
 |
| Set the Date and Time Settings
Click Next |
 |
| Wait for the initial setup process to complete and the server will reboot. |  |
| When you see that the VM has started and is waiting to be logged in,
Press the Ctrl + Alt + Del button combination shortcut on the menu pane |
 |
Once logged in, you will be prompted to insert the second disk (if there were 2 ISO files).
|
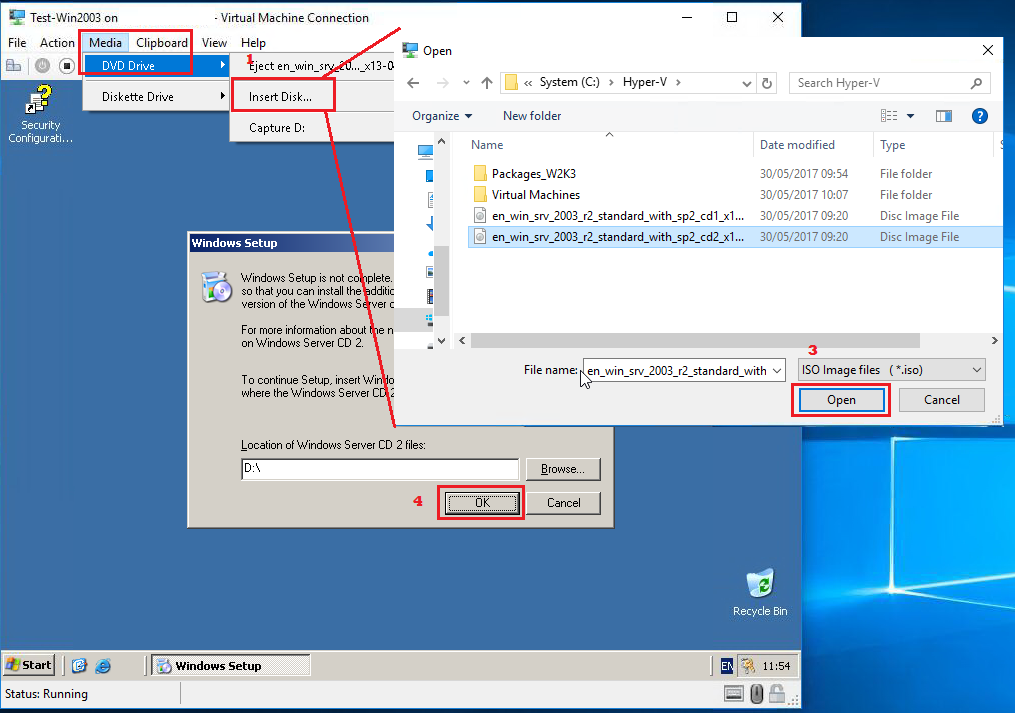 |
| This will install R2 files.
Follow the instructions by clicking Next and finally Finish |
 |
| Once this is complete, please insert the Disk 1 again (follow the previous 2 steps) and browse to the CD Drive\SUPPORT\TOOLS folder in the virtual Machine |  |
| Copy the DEPLOY.CAB file to C:\ drive
Extract the contents of DEPLOY.CAB file to C:\WindowsS\System32\Sysprep folder |
 |
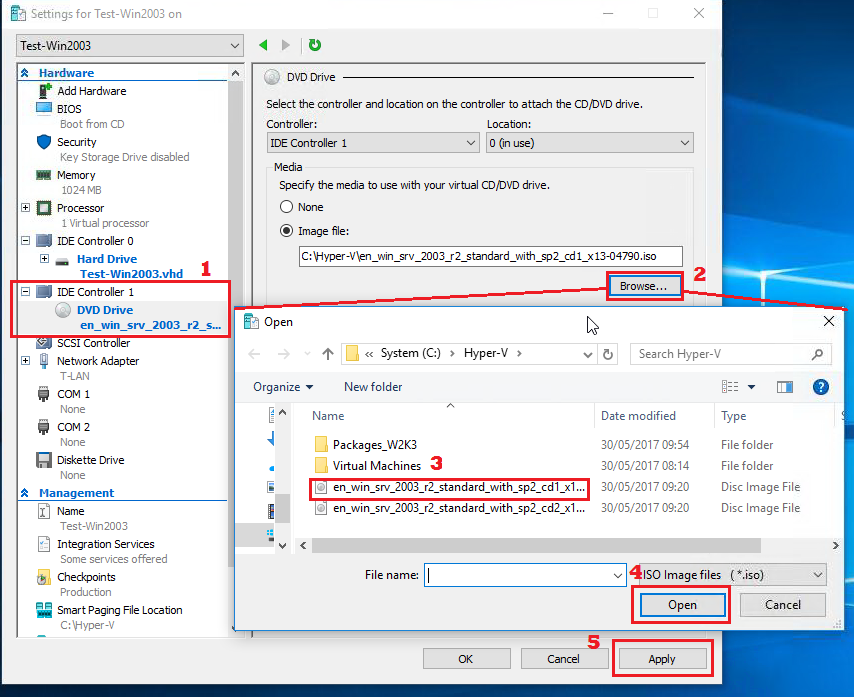
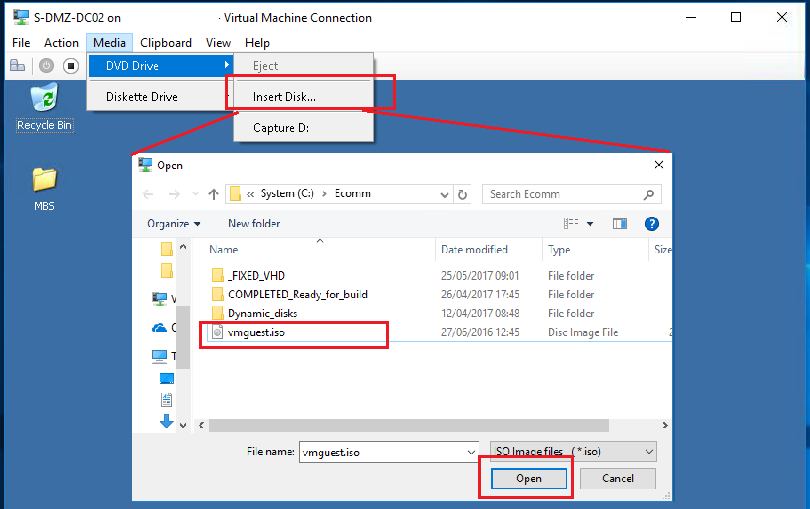
| We will now install Hyper-V Integration Services on the VM.
We must first attach the vmguest.iso (downloaded from the links provided earlier in this document) to the Virtual Machine Connection. Click Media -> Insert Disk… option. Browse the location for vmguest.iso Select Open |
 |
| You will see a popup asking you if you wish to proceed with the installation process of the Hyper-V Integration services.
Click Yes to begin the process |

|
| The installation process will require few restarts to ensure all the required services are installed and working correctly.
Click Yes. This whole process can take up to 30 minutes per VM. |
 |
Before proceeding to the next step, please ensure that the below are done.
|
|

 or simply by choosing Action (menu item)
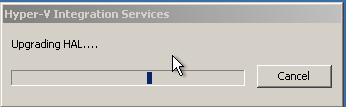
Hyper-V Services Checks
Verify that Hyper-V Integration Services is installed successfully.
LAN Connection
When the Virtual Machine restarts, you will find the Local Area Connection notification which might indicate that Hyper-V services has worked and Network Adaptor is connected.

Figure : Hyper-V Integration Services Check – LAN connection
To confirm it, open command window by typing cmd.exe in Run dialog, in the command prompt window, type ipconfig command to see if the VM has been assigned an IP Address as shown below.

Figure : Hyper-V Integration Services Check – Ipconfig check
Hyper-V Services Check
Launch Services Panel (You can easily get there at any point by simply hitting WIN + R on your keyboard to open the Run dialog, and typing in services.msc), and check if the Hyper-V services are in Running or Started state

Figure : Hyper-V Integration Services Check – Services install check
Check Essential Services are running
Check if the windows essential services are running in the Virtual Machine, if they are with issues, please try to rectify the error before uploading to Azure. A few essential services are highlighted in the picture below:

Figure : Hyper-V Integration Services Check – Few Essential Services
Generalize the Windows Server 2003 R2 Virtual Machine using Sysprep
The last step is to generalize the VHD for creation of Virtual Machines in Azure using the Sysprep tool.
| Step | Snapshot (if any) |
|---|---|
| Go to sysprep folder (C:\windows\system32\sysprep)
Launch setup manager (SetupMgr.exe) |
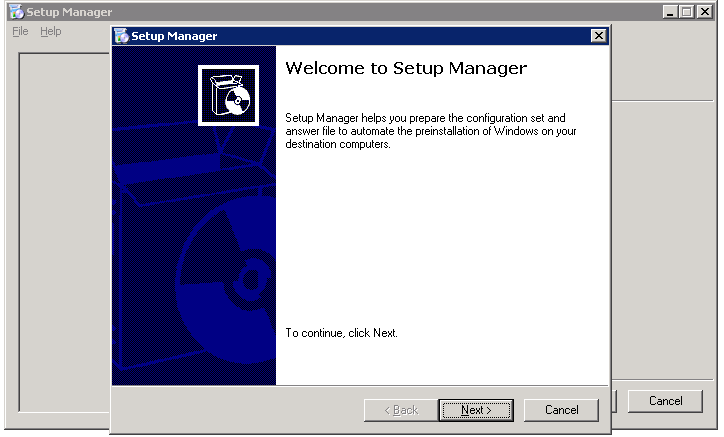 |
| Setup Manager Wizard
New or Existing Answer File
|
 |
| Setup Manager Wizard
Type of Setup
|
 |
| Setup Manager Wizard
Product Select the Windows 2003 version Click Next |
 |
| Setup Manager Wizard
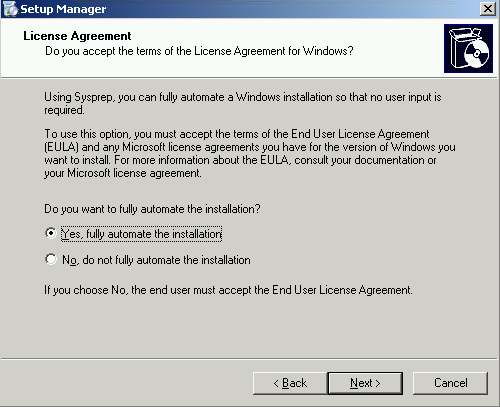
License Agreement Select “Yes fully automate the installation” Click Next |
 |
| Setup Manager – Settings Dialog
Click Next if no change |
 |
| Change the Time Zone settings
If not change, click Next |
 |
| Please proceed through each window and provide a Product key which is valid
Click Next |
 |
| Change the License Agreement settings
Click Next if no change |
 |
| Computer Name
Select Automatically Generate Computer name option Click Next |
 |
| Administrator Password
Provide a complex Administrator account password and confirm the same. Click Next when done |
 |
| Networking Components
Click Next if no change |
 |
| Workgroup or Domain
Provide the Domain name and the right credentials Click Next (if no change) |
 |
| Click Next whether or not there are any changes |  |
| Regional Settings
Set the required regional settings as per the requirement for the customer. Please do note that these can be changed once the new server is built. |
 |
| Languages
If there are any additional languages required select here. Click Next to proceed |
 |
| If there are any printers, please add them here.
Click Next |
 |
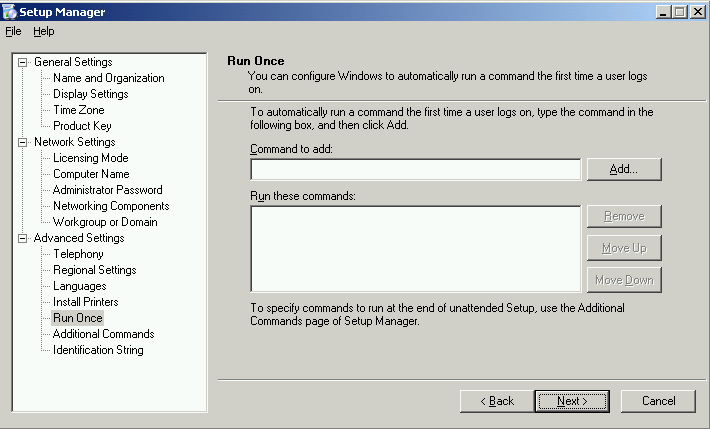
| Run Once commands if any, please include them.
Click Next |
 |
| Any additional post provision scripts which need to run after the new VM is created can be added here. Ensure the proper scripts are placed within the sysprep VHD first when you refer to a script file in the commands and you click Add to include the script files.
Click Next |
 |
| Identification String
These are useful when you wish to identify if this was built via sysprep and other details for future inventory Click Finish to complete |
 |
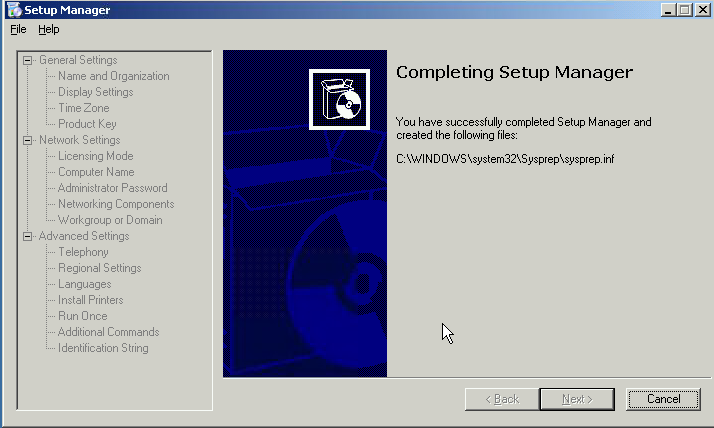
| Click OK to save the Sysprep.INF file to the location C:\Windows\System32\Sysprep |  |
| Ensure that the result is as shown with a Success message.
Click Cancel in the final dialog to dismiss the Setup Manager Wizard. |
 |
| Check that there is a new folder called sysprep created in C:\ with a sub folder named i386 (for x86).
IF the image is for a x64 OS, please rename this sub-folder to amd64 and update the sysprep.inf file entries similarly. |
 |
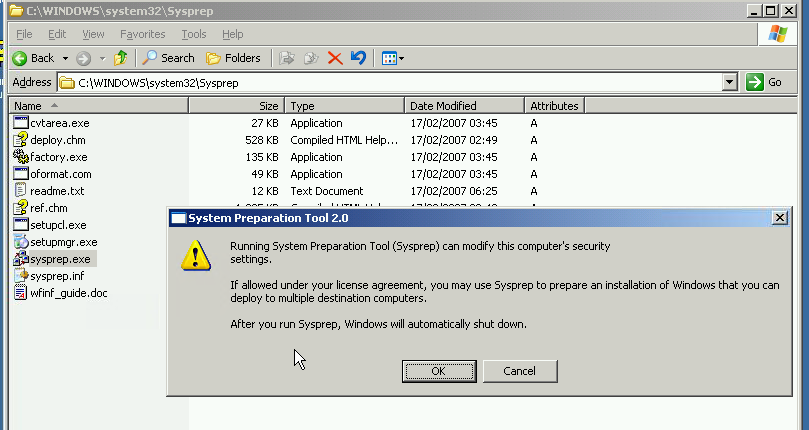
| Finally, browse to C:\Windows\System32\Sysprep folder
Launch Sysprep.exe by double-click the exe file. Click Yes in the resulting pop up dialog |
 |
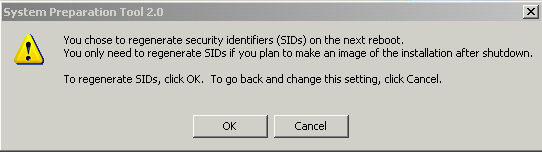
| Click on Reseal option in the System Preparation Dialog box
Ensure the Shutdown mode is set to Shut Down Click OK when there is a message warning about change to SIDs. |

|
| The Virtual machine will shut down automatically after Sysprep has completed. |  |
Final Steps before uploading to Azure
The last step is to shut down the Virtual machine in Hyper-V, and upload the VHD which is described in the below steps
| Step | Snapshot (if any) |
|---|---|
| Shutdown the Virtual Machine from OS Level with an appropriate Shutdown Event Tracker message
Operating System: Reconfiguration(Planned) |
 |
Detach the VHD from the Virtual Machine in Hyper-V.
|
|
| Upload the VHD to Azure using Microsoft Azure Storage Explorer
Launch the Microsoft Azure Storage Explorer and login using your Azure Portal access id. PS: the GUI screenshot is taken based on the Microsoft Azure Storage Account version 0.8.13 |
 |
| Browse to the desired Storage Account and the Blob Container within where the VHD need to be uploaded from the Explorer Pane | 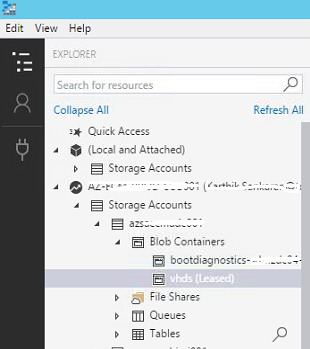 |
| In the right-side Details Pane, click Upload – Upload Files … option |  |
In the Upload Files dialog
|
 |

 next to Files field to open the “Select files to upload” dialog.