Prerequisites
The following pre-requisites must be met before performing the below steps.
- The backend service must already be in place and fully configured to be exposed via either HTTP or HTTPS.
- Firewall rules need to be in place to allow traffic to the reverse proxy and from the reverse proxy to internal server and vice versa. These will not be covered in this document.
Assumptions
For the IIS and ARR configuration we will assume the following scenario:
- The reverse proxy externalised access domain to 3rd parties will be: www.test.website.com
- www.test.website.com is bound to the reverse proxy’s public IP and internally to 10.1.1.1
- The internal server exposes the service as: http://10.0.0.1/appname/test.asmx
- 3rd parties will hit the reverse proxy as: https://test.website.com/internalapp/test.asmx
- A server certificate has been signed by a public Certification Authority and corresponds to the www.test.website.com domain
- The server certificate has been installed in the reverse proxy
Overview
When Windows servers are being used, IIS (Internet Information Services) and ARR (Application Request Routing) can easily be configured for the VM/Servers to work as reverse proxy.
| Note:
The below steps will cover IIS 8.0, which comes by default in Windows Server 2012 and above. |
Software Requirements
The software that will be needed to configure the reverse proxy are:
- Internet Information Services (IIS)
- Microsoft Web Platform Installer
- Application Request Routing (ARR)
Installing IIS in Windows Server 2012
From the Server Manager select “Install Roles and Features”
- Select Server Roles
- Tick Web Server (IIS)
- Click Add features and wait for installation to complete
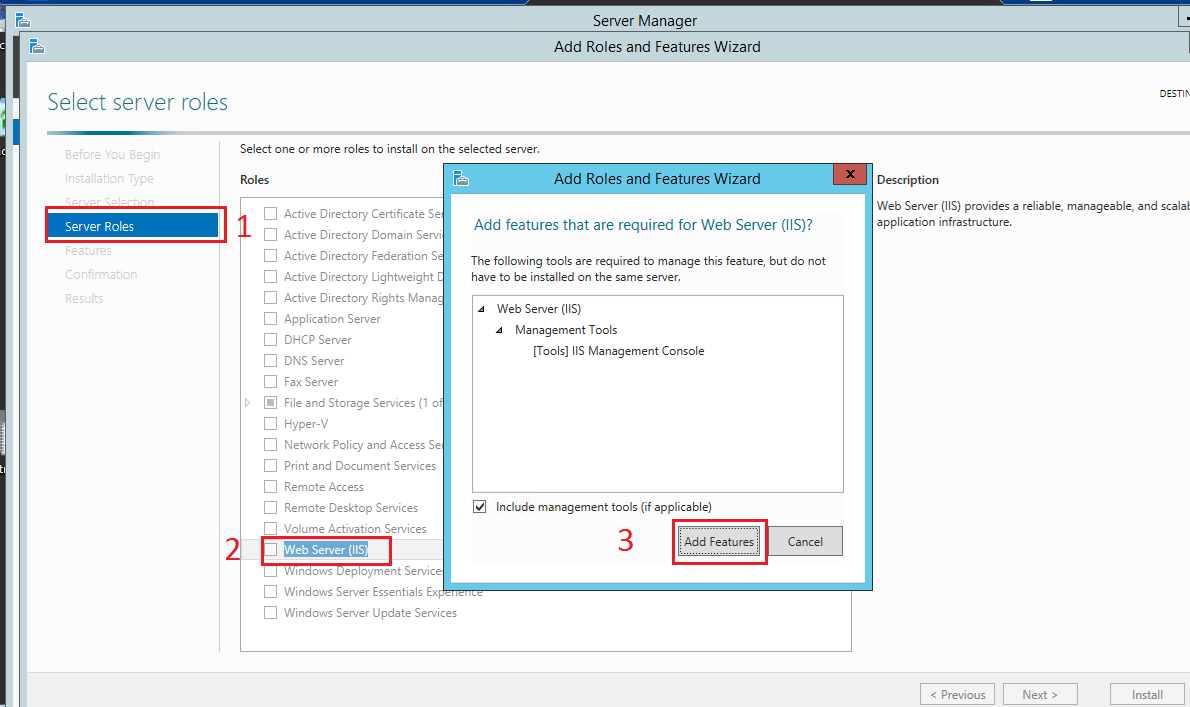
Figure : Installing IIS
Installing Microsoft Web Platform Installer
From any web browser search for Microsoft Web Platform Installer and install the latest version.
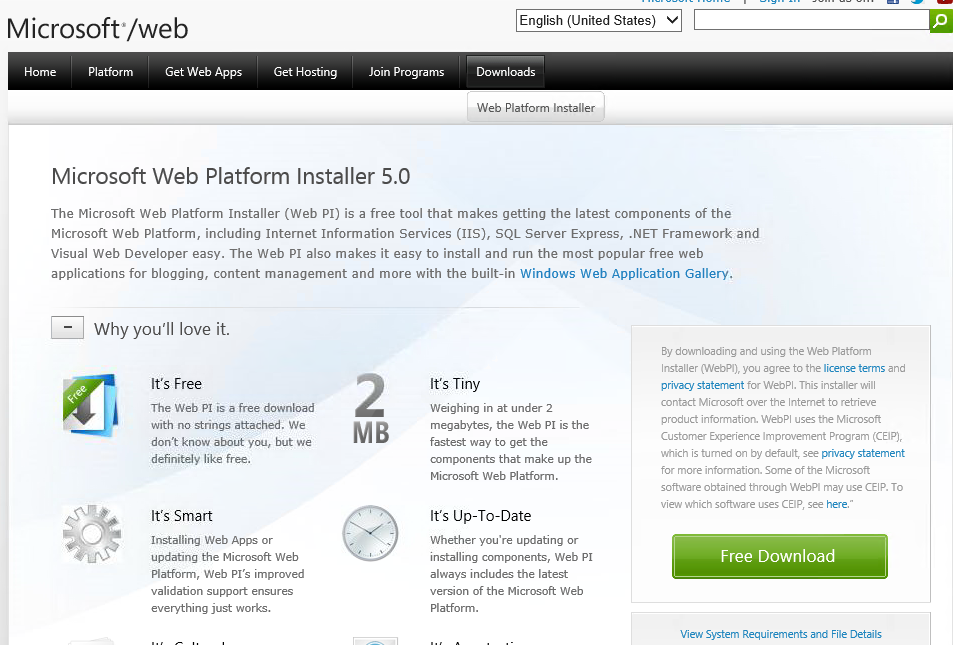
Figure : Installing Web Platform Installer
Installing ARR
Open the installed Web Platform Installer and search for Application Request Rerouting or ARR. Select the latest version and install:
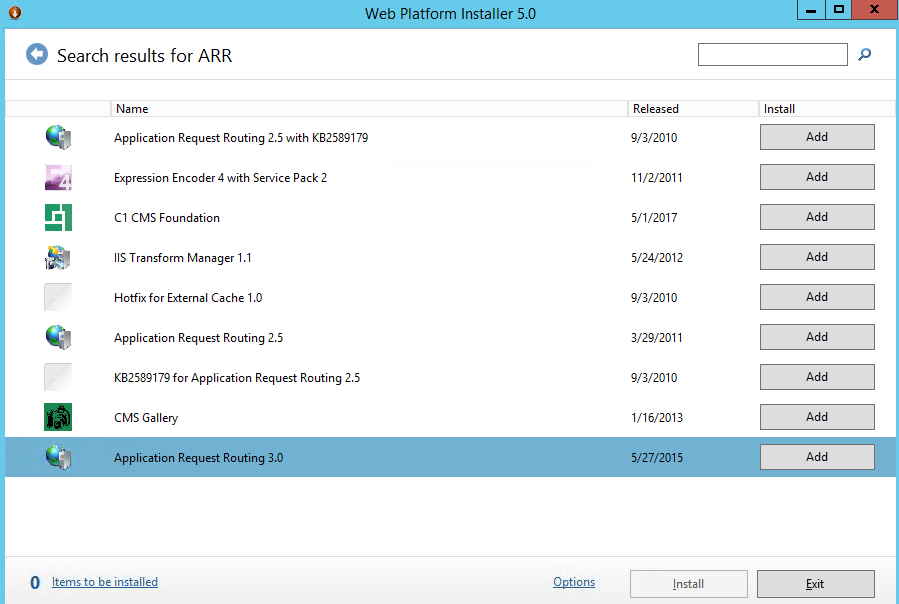
Figure : Installing ARR from Microsoft Web Platform Installer
Configuring IIS as Reverse Proxy
The rest of the configuration will take place in the IIS Manager. Open “Run” from Windows search and type “inetmgr”.
This will open the IIS manager GUI showing the default website. URL Re-write should be visible after ARR has been installed:

Figure : IIS default view with URL Re-write installed
Creating a new website in IIS
A new website will need to be created in order to service the requests to the reverse proxy and re-route traffic to the backend service.
- Right Click on Sites
- Type the new website name
- Define the physical path
- Select a HTTPS binding to the Server’s internal IP
- Select the previously imported server certificate
- Click OK
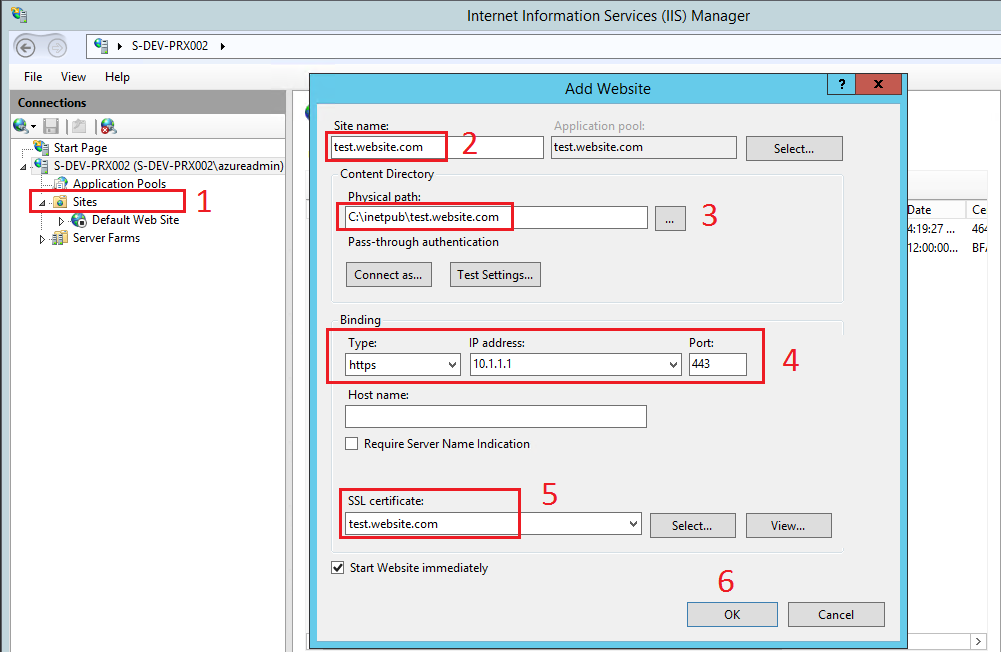
Figure : Creating a new website in IIS
Configuring the URL Re-write Rules
On IIS Manager select the newly created website and then double click “URL rewrite” on the main pane and finally select “Reverse Proxy”:
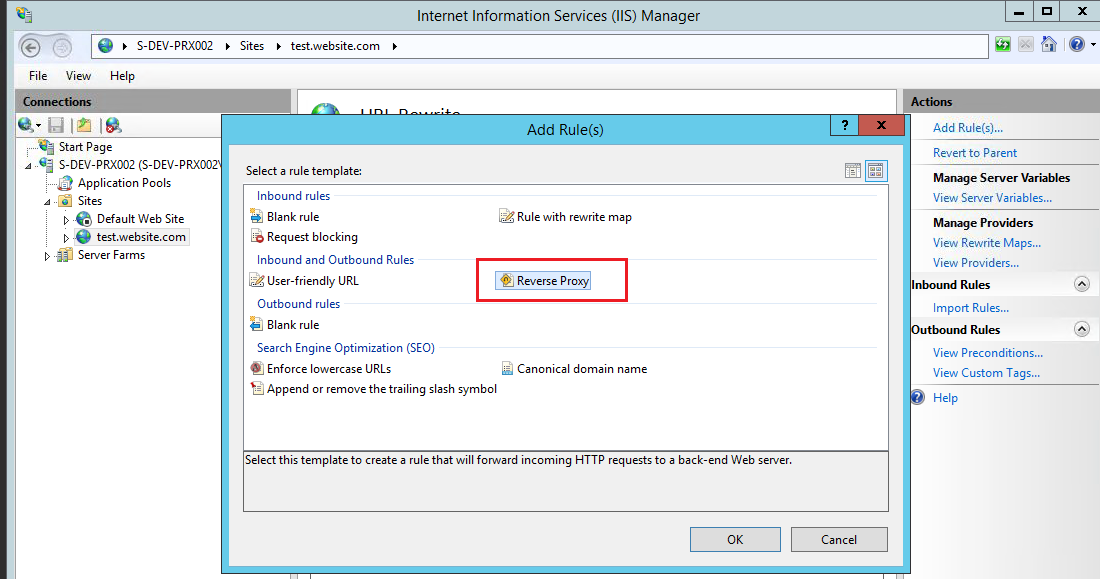
Figure : Creating re-write rule
- Type the IP of the backend server, where the reverse proxy will re-route requests. In our scenario this is 10.0.0.1.
- Type the IP of the newly created website, as this refers to where the response from the backend server will be routed. In our scenario this is 10.1.1.1.
- Click OK
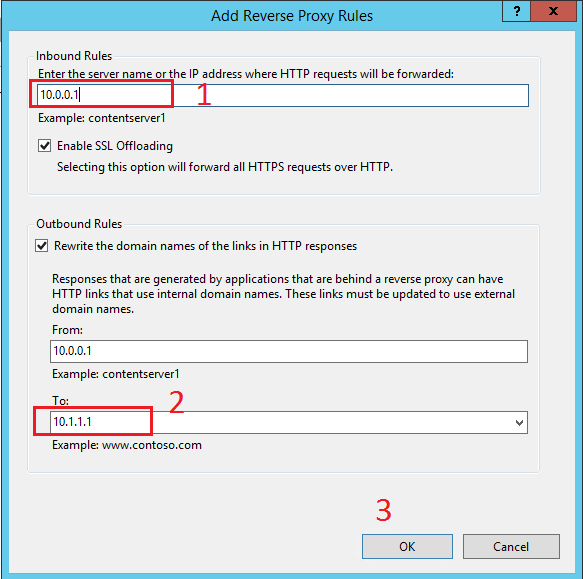
Figure : Configuring re-routing to backend IP and response to reverse proxy
This will automatically create an inbound and an outbound rule.
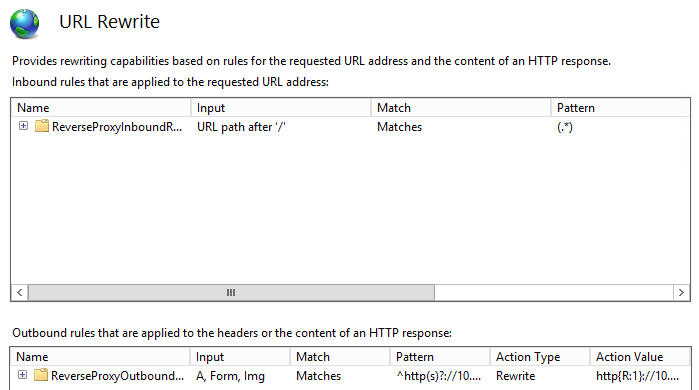
Figure : Default re-write rules
Double click on the inbound rule and make the following configuration:
- Select Wildcards
- In the Pattern field, type the part of the URL that comes after the reverse proxy’s website, when the external users will be accessing it https://test.website.com/
- In our scenario that would be internalapp/*, with the * covering everything that comes after this part (it could be just a * if no directories are being used)
- The Entire URL the external users would use is: https://test.website.com/internalapp/test.asmx
- Click on Test Pattern to check whether the access URL to be used matches the rule
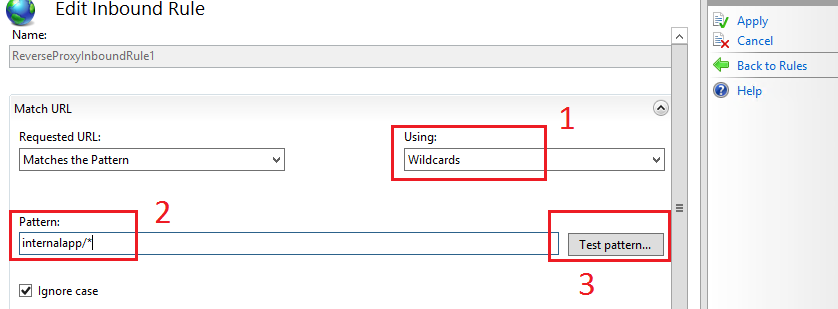
Figure : Configuring Inbound rule
- Enter the last part of the URL external users will be using to hit the reverse proxy (internalapp/test.asmx), omitting the https:/test.website.com/ part.
- Check the return values
- {R:0} this will not be used
- {R:1} this will be used as an appended value to the URL which will be re-written to the internal server
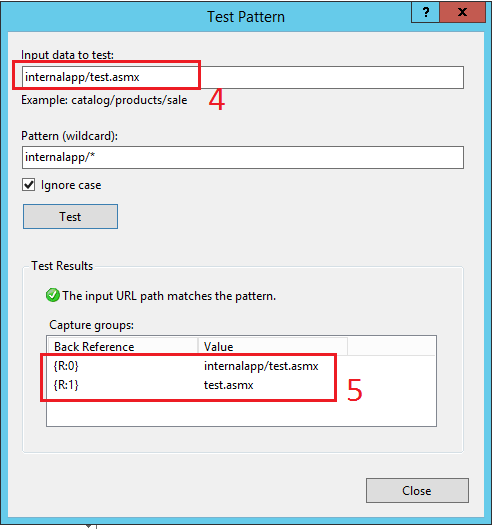
Figure : Testing if URL matches the inbound rule
After you close the test window, further below in the inbound rule configuration window:
- Select Rewrite
- The Rewrite URL will initially be as http://10.0.0.1/{R:1}. This is incorrect, so the middle part needs to be added as: http://10.0.0.1/appname/{R:1}, where {R:1} = test.asmx, as per the above rule check, so that the final rewritten URL will look like: http://10.0.0.1/appname/test.asmx, which is how the service is exposed via the internal server.
- Select “Append query string”
- Select “Stop processing of subsequent rules” and save the amended rule.
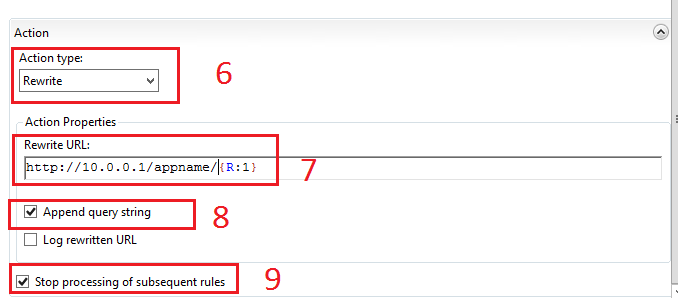
Figure : Further inbound rule configuration
No configuration is needed for the outbound rule.
| Note:
All the above configuration is indicative, based on the assumptions in Section 2. For any other custom IP set and internal – external URL setup, the rules need to be amended accordingly. |
Creating Client Certificates (Optional)
This is not part of the standard reverse proxy configuration. However, in many cases, client certificates would be required at the external users’ devices for secure access to the reverse proxy and backend server.
Normally, a Certification Authority would create those, but for testing purposes, client certificates can be generated in the reverse proxy and then can be distributed to external users.
7.1 Creating a Self-signed RootCA in the Reverse Proxy
From any web browser, search for Windows Software Development Kit. Download and install the latest version:
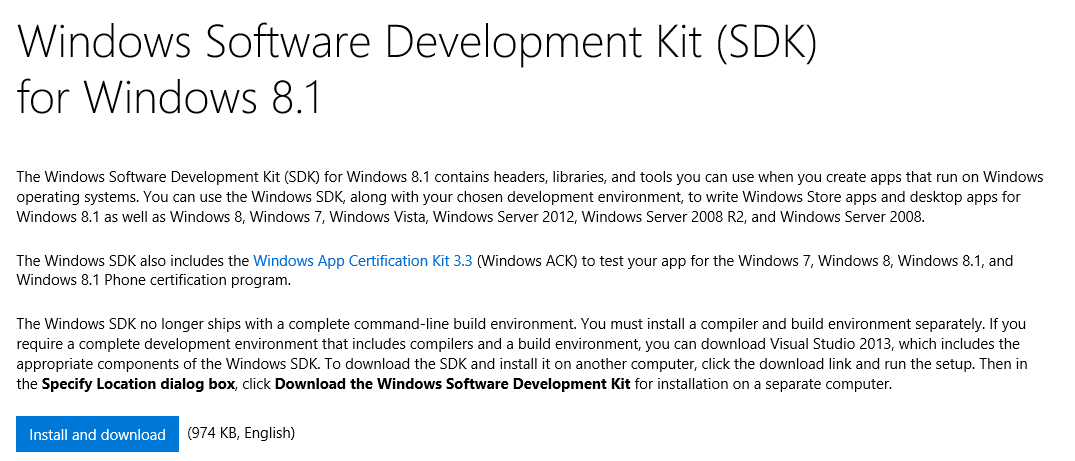
Figure : Downloading the Windows SDK
After the installation is complete, makecert.exe that will be used for the certificate generation will be in the following directory:
C:\Program Files (x86)\Wnidows Kits\8.1\bin\x64
- Open cmd with administrator rights and navigate to the above directory.
- Run the following command:
- makecert.exe -n “CN=ClientRootCA” -r -sv ClientRootCA.pvk ClientRootCA.cer
- ClientRootCA.pvk your private key
- ClientRootCA.cer The RootCA that will be used to sign the client certificates
- makecert.exe -n “CN=ClientRootCA” -r -sv ClientRootCA.pvk ClientRootCA.cer
- Enter a password for your private key. You will be asked twice.
- Open the C:\Program Files (x86)\Wnidows Kits\8.1\bin\x64 directory and you should be able to see ClientRootCA.cer
- Copy ClientRootCA.cer to a desired location
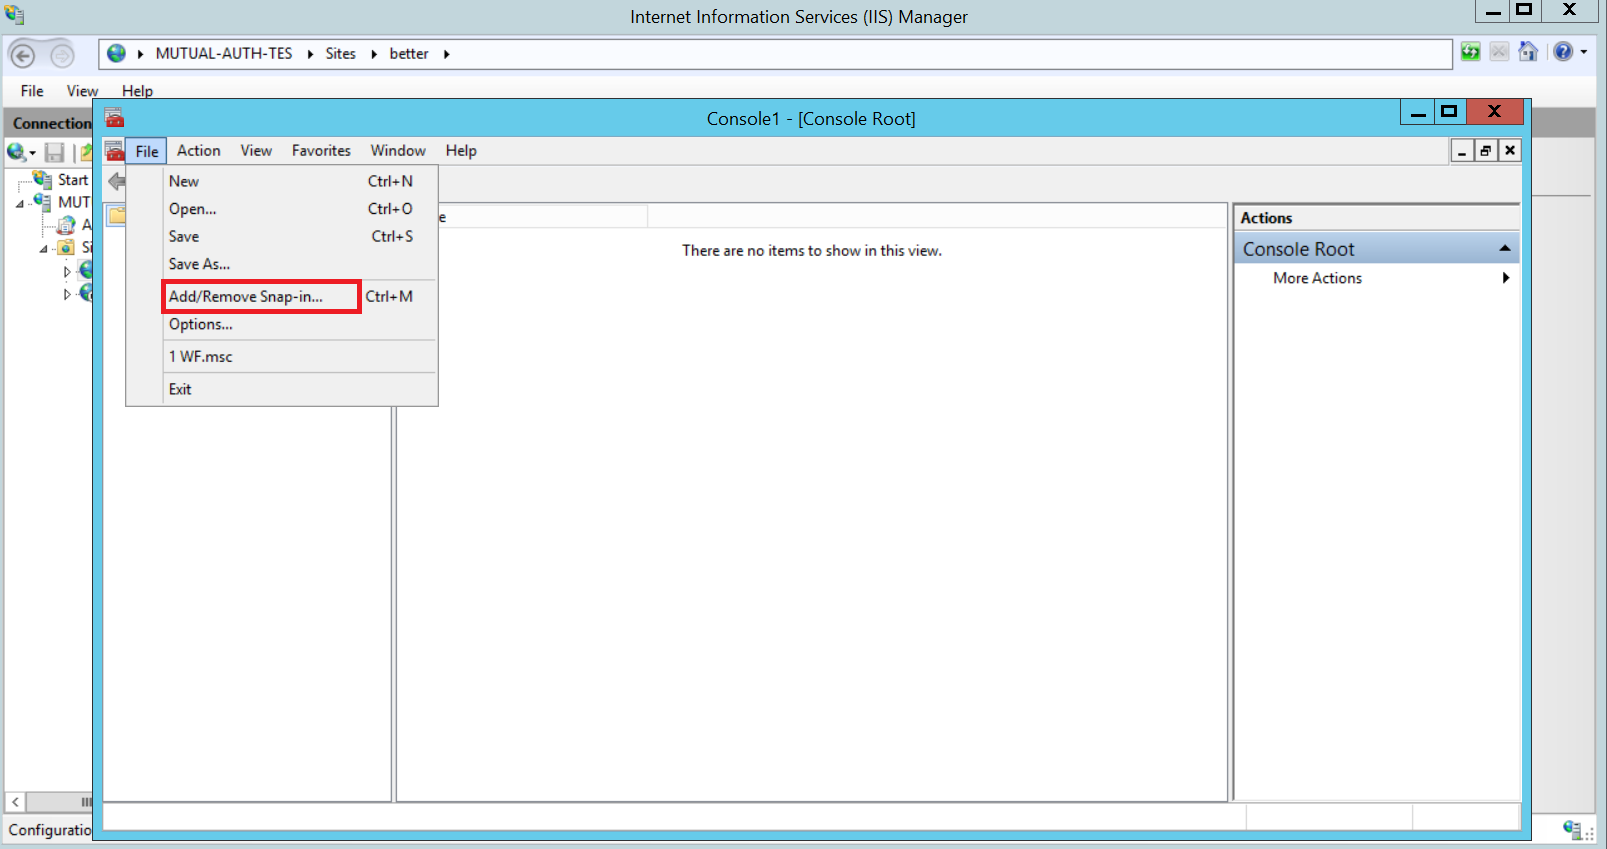
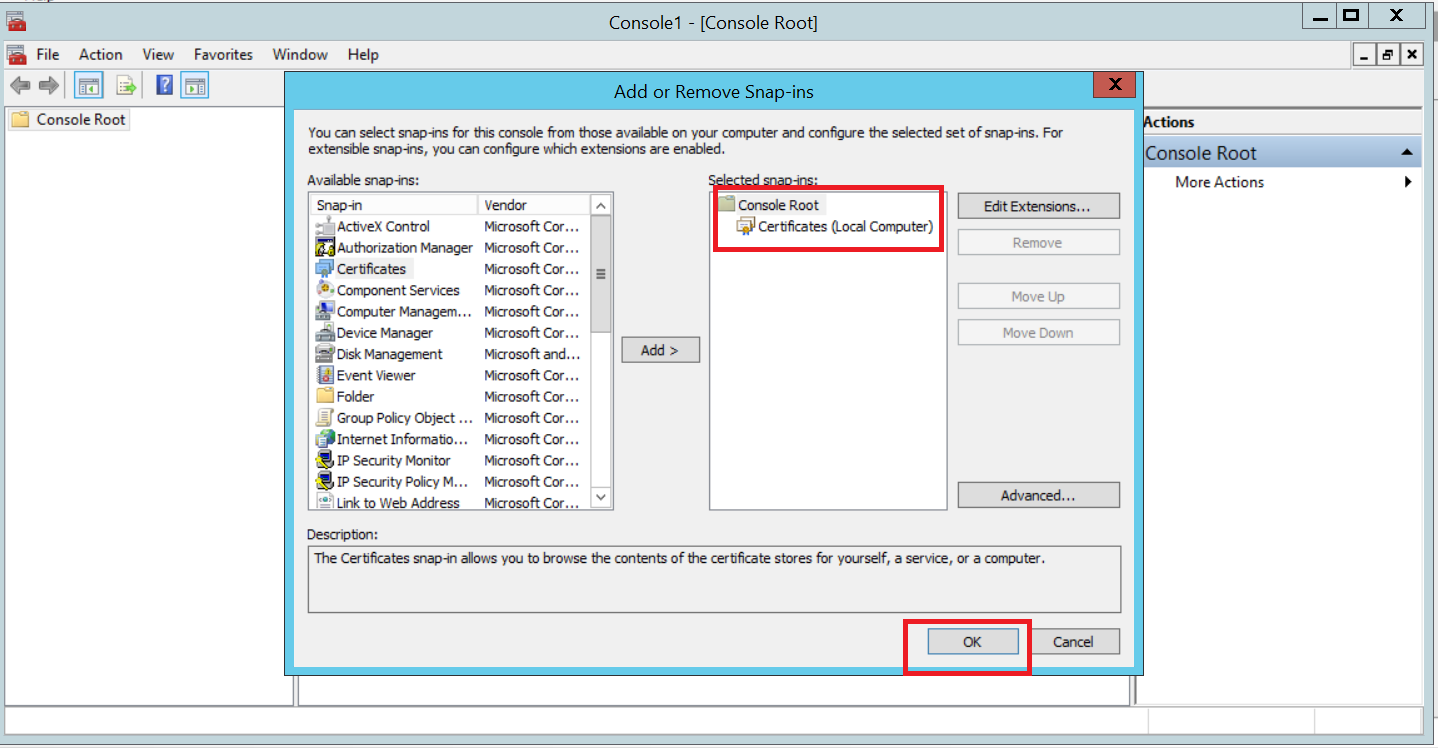
- Open Run
- Type mmc and hit enter
- File Add/Remove Snap-in
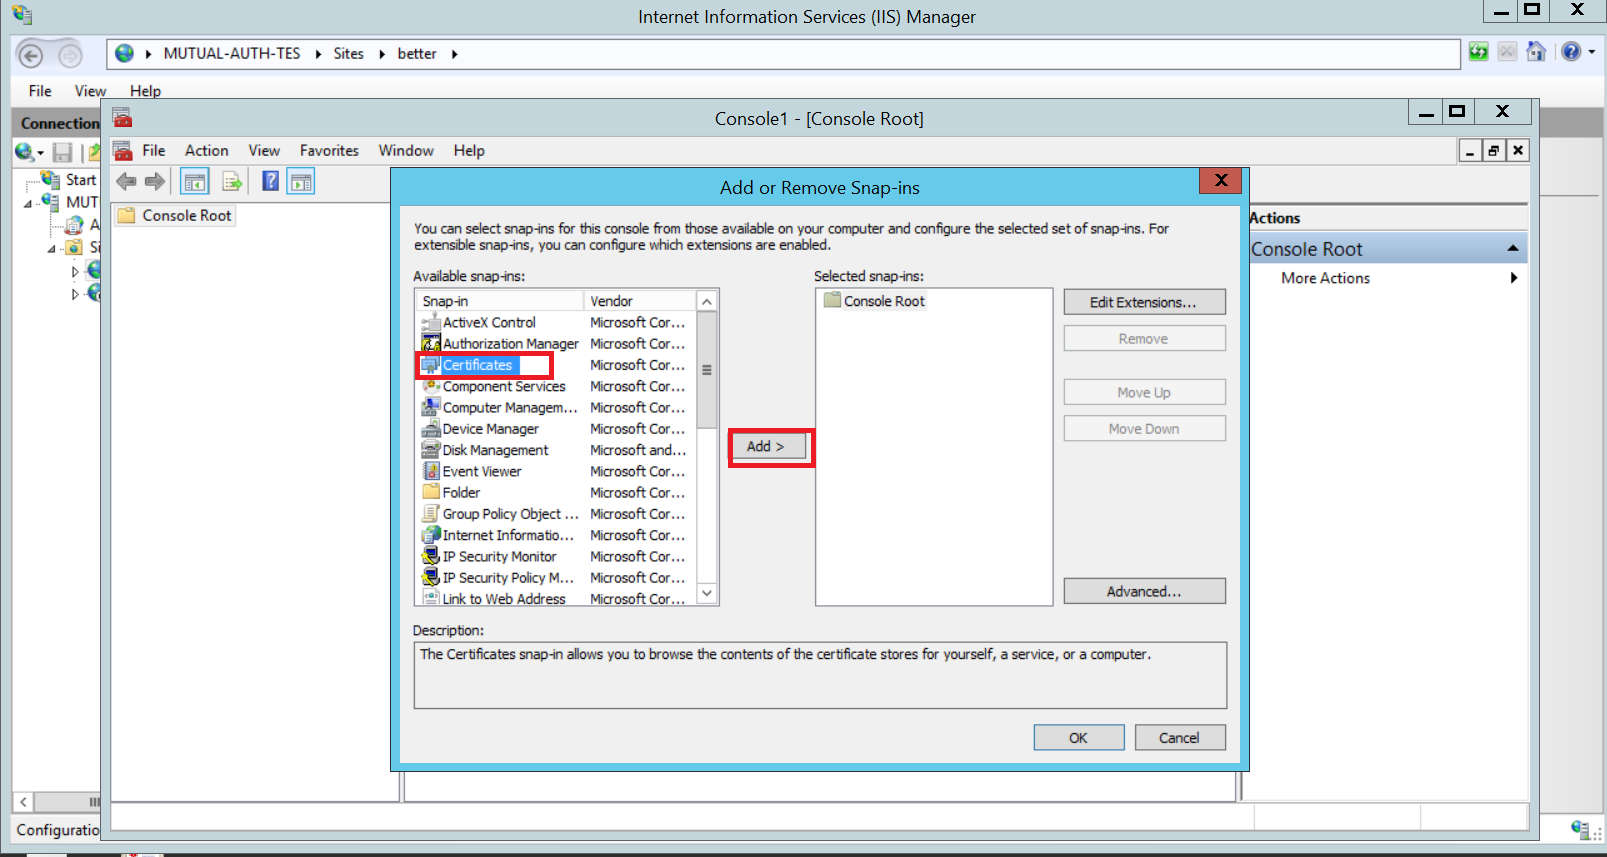
- Select Certificates Add
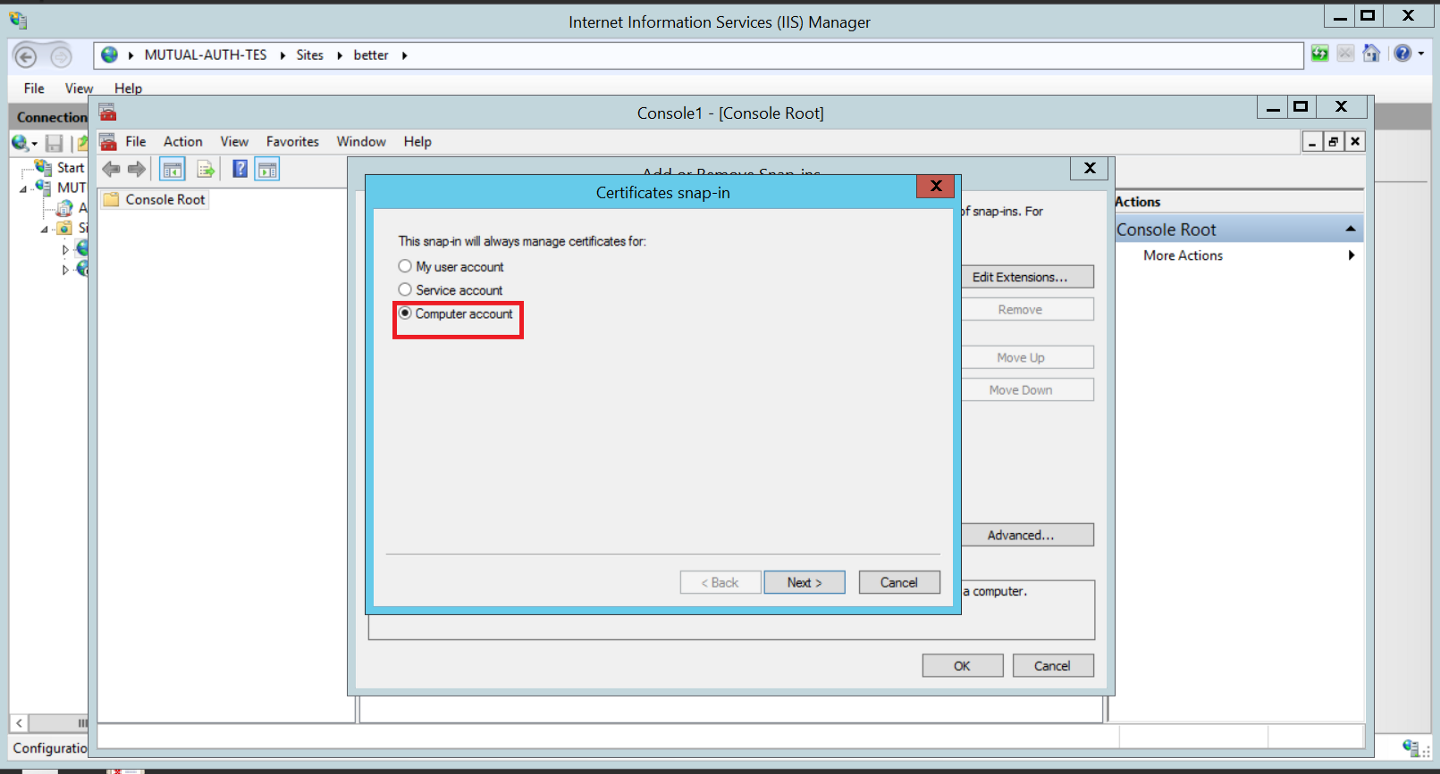
- Select “Computer Account”
- Select “Local Computer”
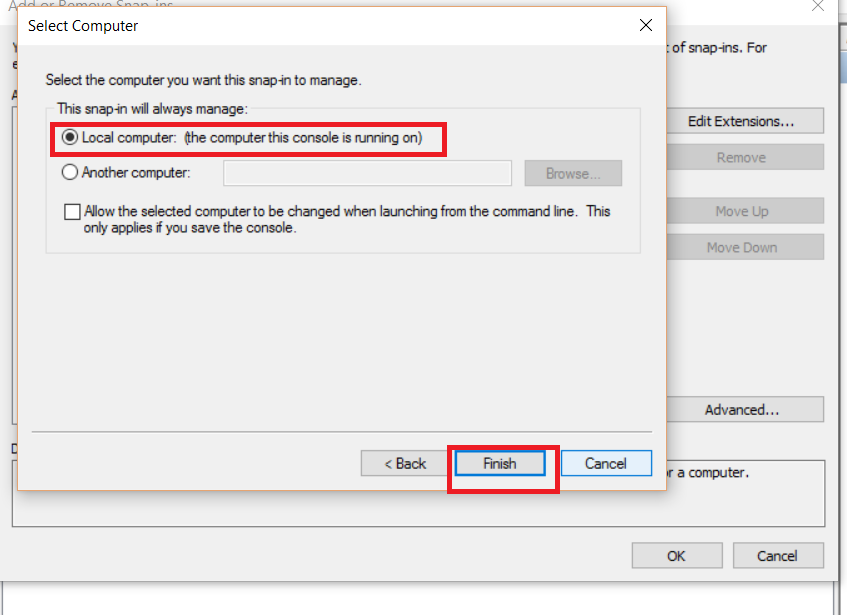
- Click OK
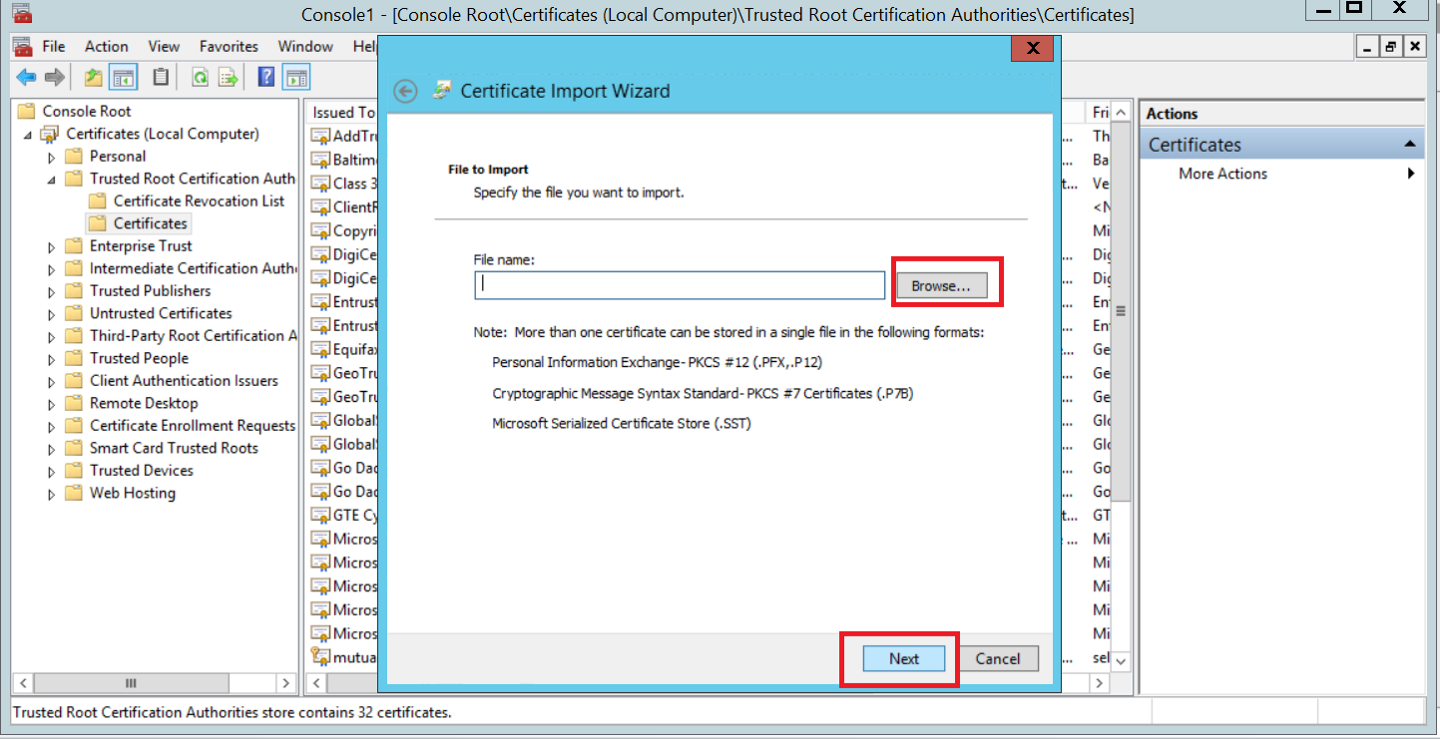
- On the left pane, select Trusted Root and expand. Then select Certificates.
- On the Certificates folder:
- Right click
- All actions
- Import
- Browse to where ClientRootCA.cer was saved and hit Next.
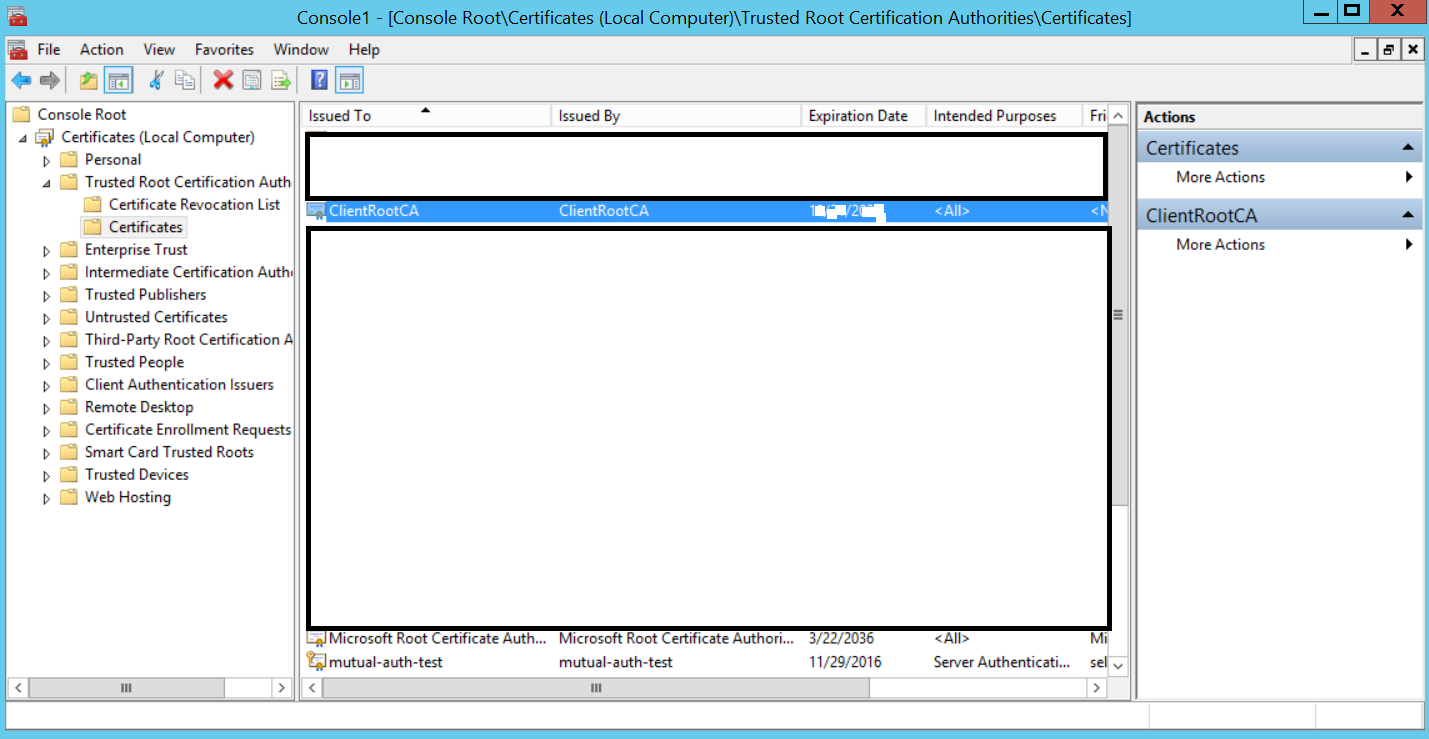
- The ClientRootCA should now be visible under the Trusted Root Certification Authorities and will be used to sign the client certificates.
Generating the Client Certificates
Open cmd with admin rights. Navigate to C:\Program Files (x86)\Wnidows Kits\8.1\bin\x64 and type the following command.
Makecert.exe -sk tempClientcert -iv ClientRootCA.pvk -n “CN=tempClientcert” -ic ClientRootCA.cer -sr currentuser -ss my -sky signature –pe
- ClientCert This is just the name for the creation
- ClientRootCA.pvk The private key that was used in Section 7.1. It should be in the same directory
- tempClientcert The newly created client certificate
- ClientRootCA.cer The RootCA that was created in Section 7.1. It should be in the same directory
You will be asked to provide the private key password that was set in Section 7.1.
The above command automatically creates the client certificate and imports it to mmc. It will have to be exported in order to be distributed to users.
- Open mmc from Run and when adding the Snap-in as in the above case, select “My User Account”
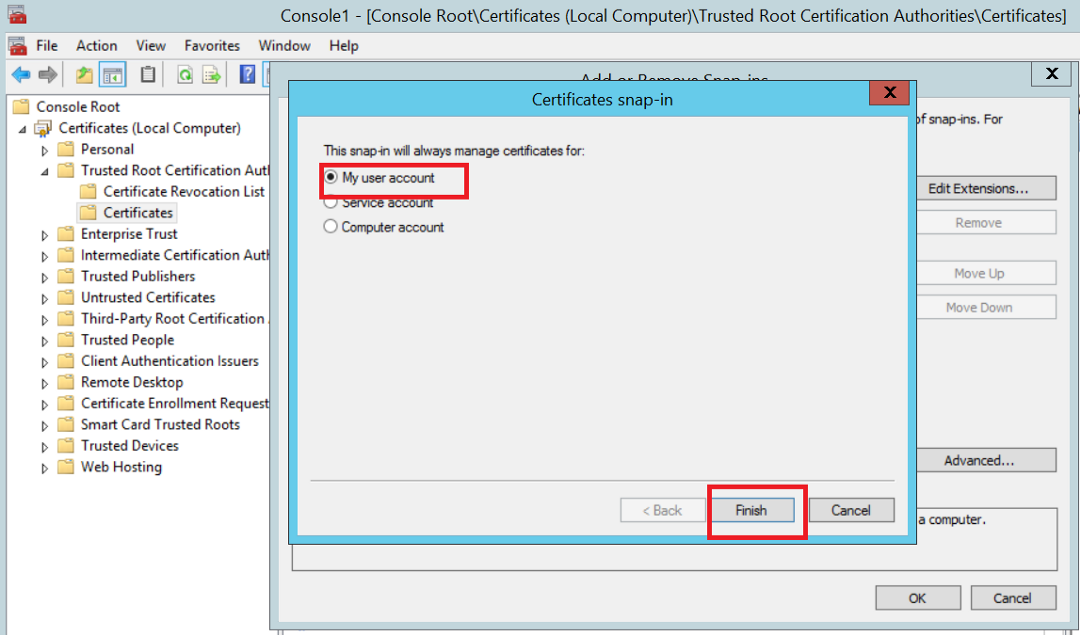
- Under Personal certificates you should be able to see the client certificate created.
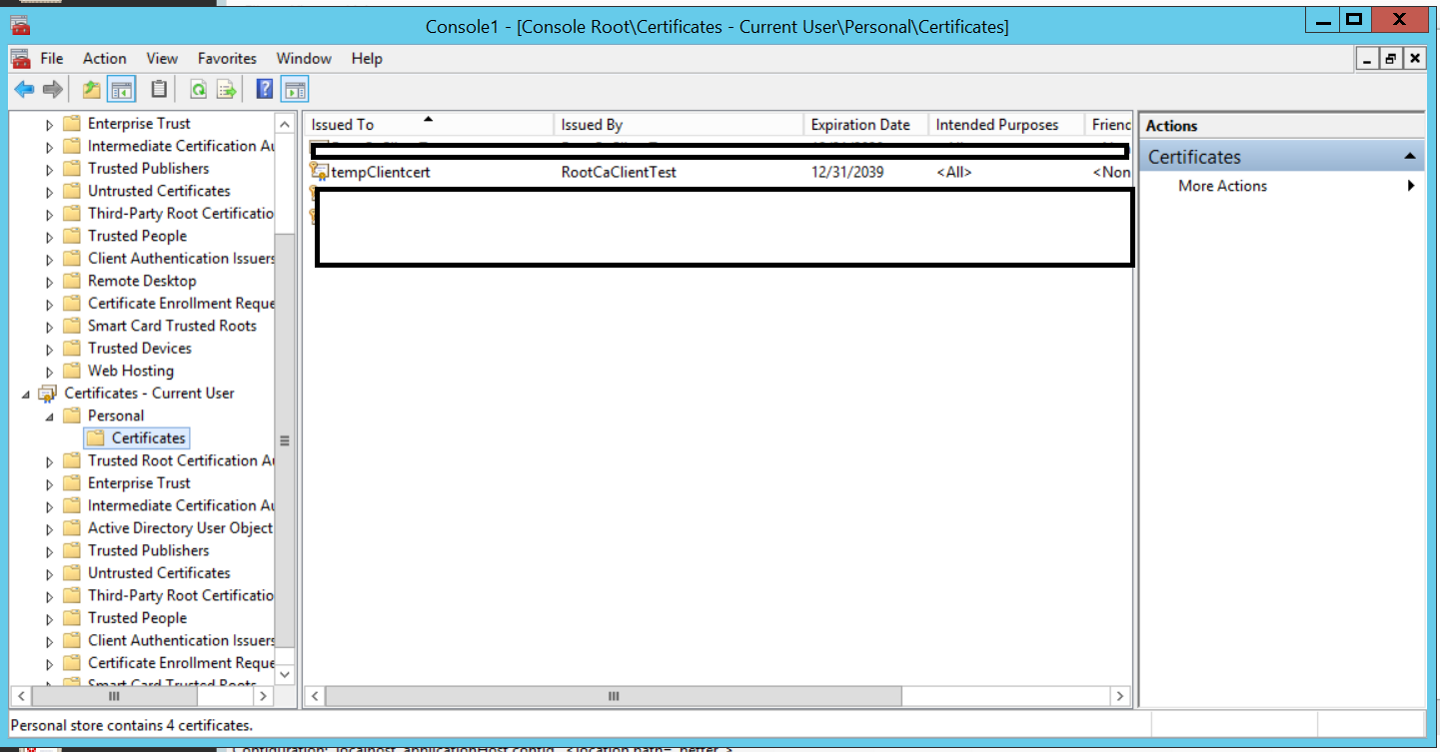
- Right click on the certificate and select Export
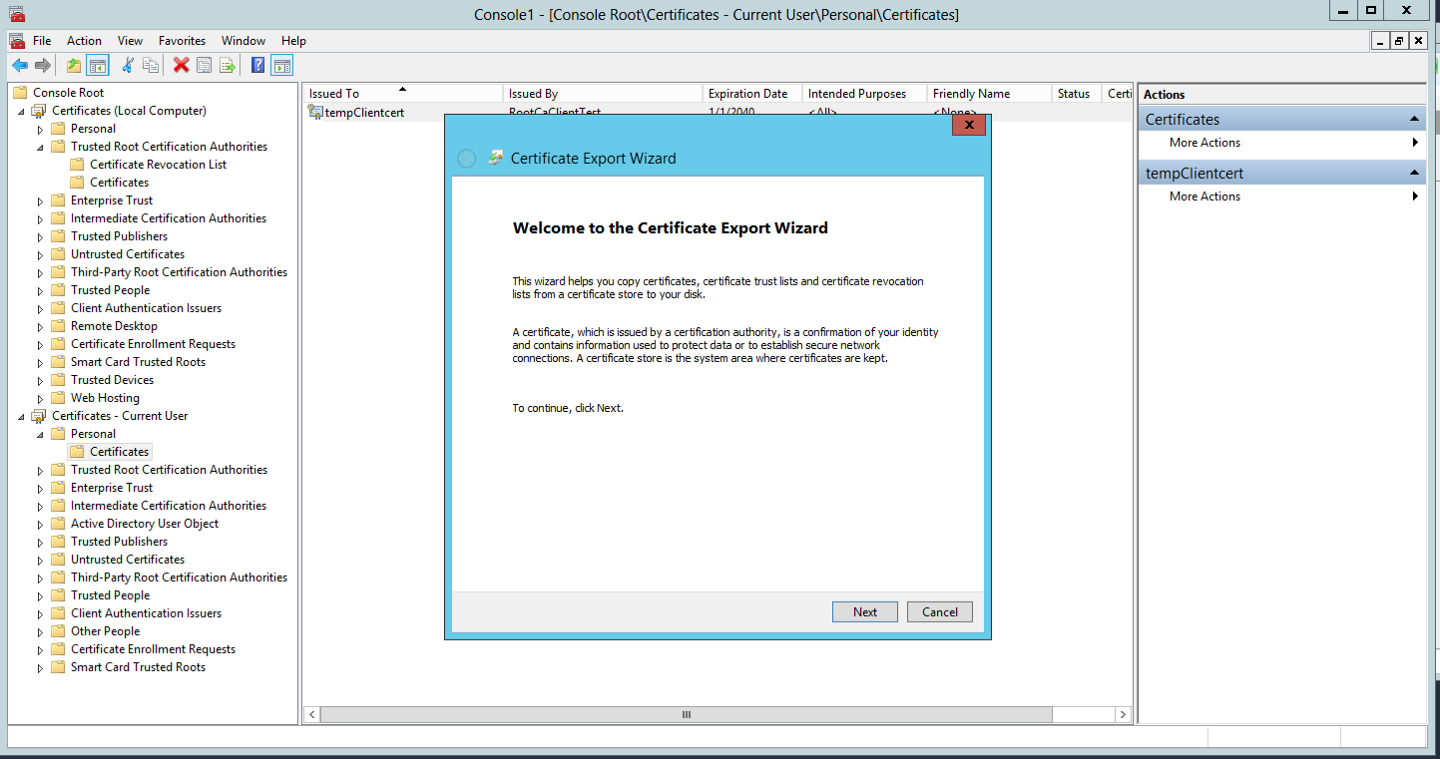
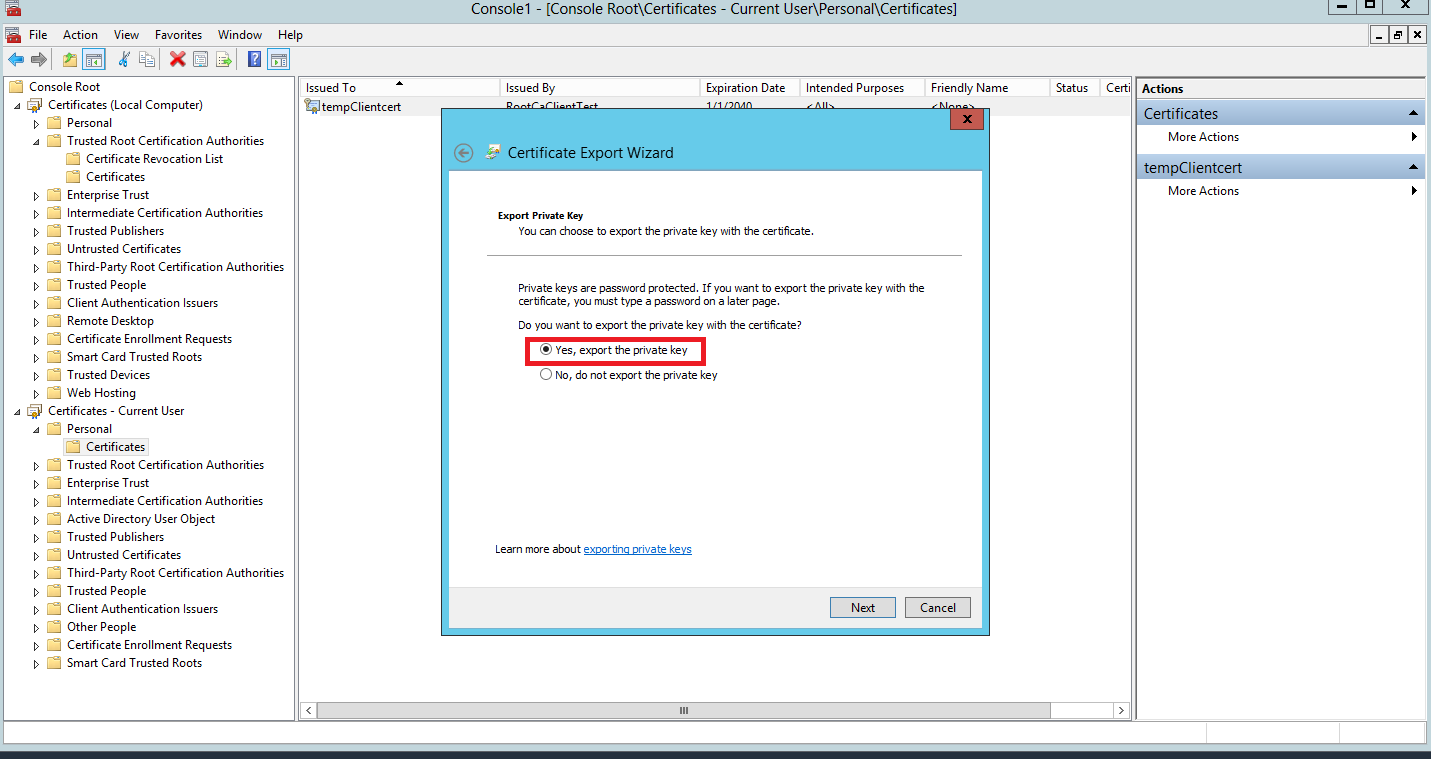
- Export the certificate with the private key as below:
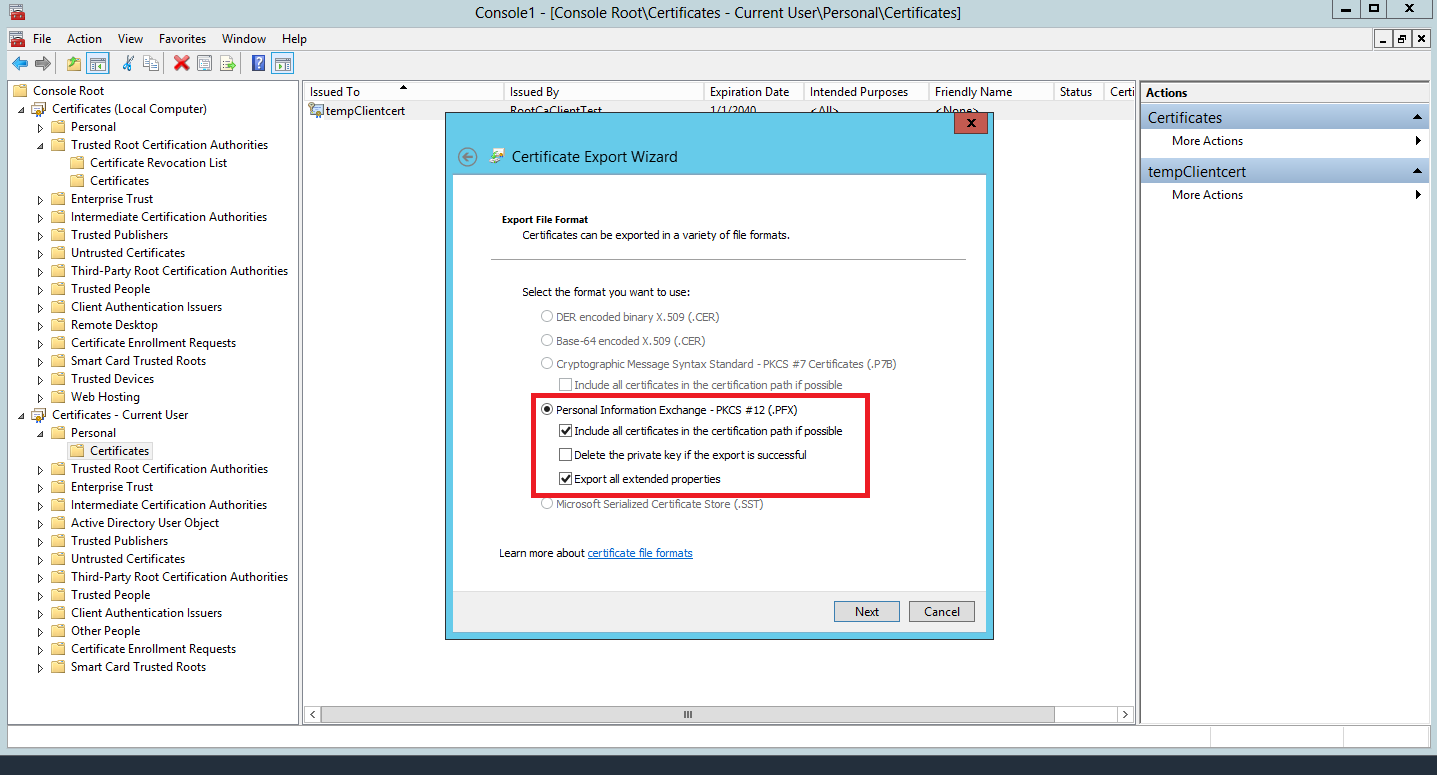
- Type the Password you used when creating the client certificate in the first place

This will save the tempClientcert.pfx to your selected directory. The tempClientcert.pfx and the ClientRootCA.cer need to be distributed to client, who will have to import these via mmc in order to get authorised against the server.
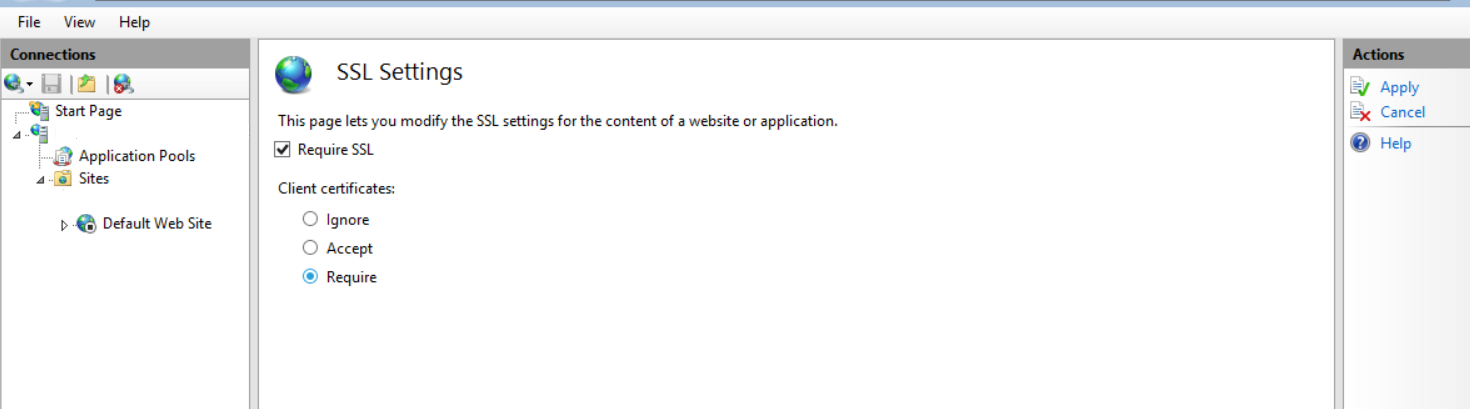
Finally, in order to enforce authentication via client certificate, in IIS Manager, selrct your website, then select SSL Settings in the main pane and enable SSL, requiring client certificate as shown below and finally click Apply to save the setting:
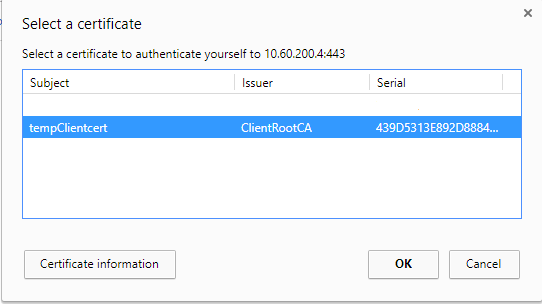
After the clients have installed the client certificate and the RootCA certificate, each time they try to access the reverse proxy via a browser, they will be asked to select the client certificate in order to connect to the service.
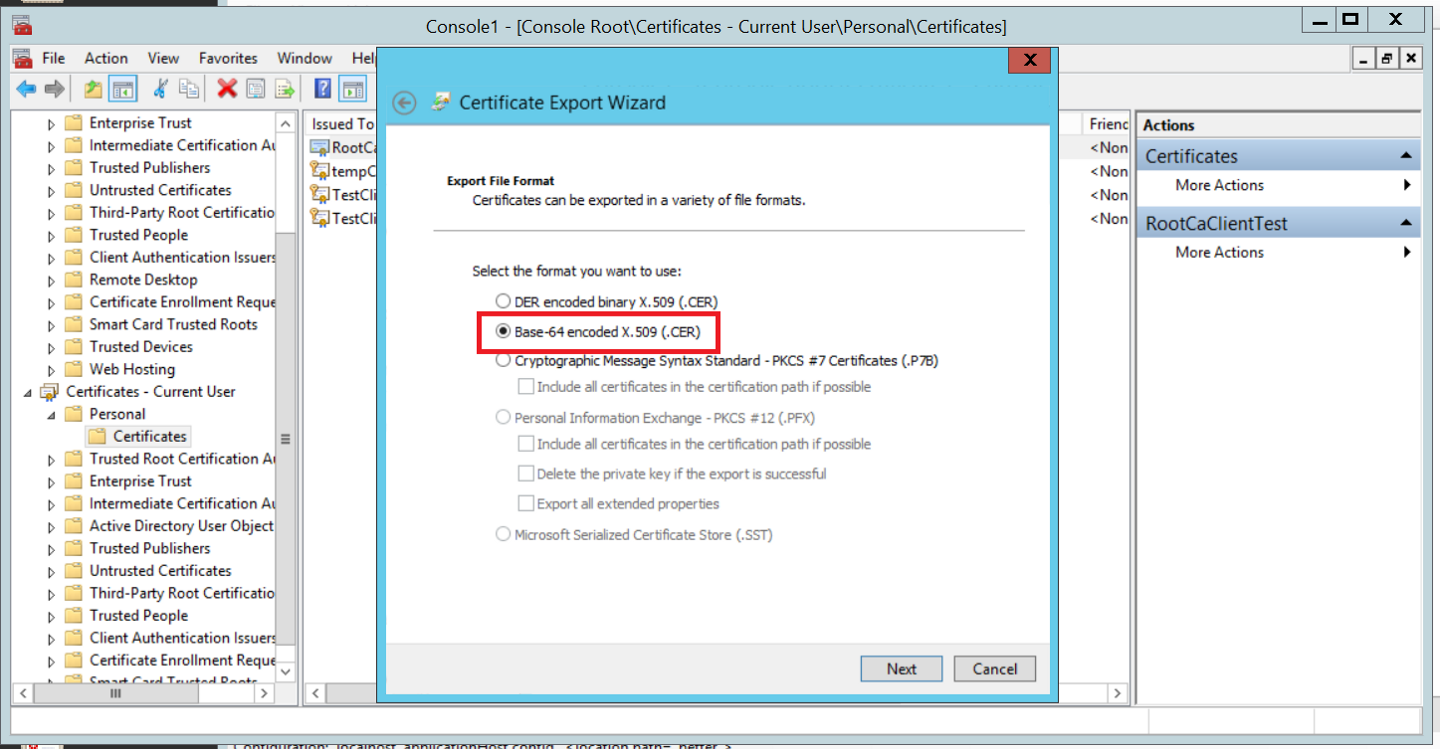
If the certificate is to be used by an application, it can be exported only with the public key, as a .cer file in an X.509 format (steps are identical to the export with private key, just select the .CER type. See below).